Sunday, September 11, 2011

FAKE BAKES

"This faux cupcake looks sooo real, you might want to dig in with fork. It's a great home and kitchen decor...but might even look good on your office desk. It can also hold notes and photos."
No, you can't eat them. No, they do not contain anything edible. So what then can they be used for? 


They make great card holders! Just put a card with something along the lines of "Happy Birthday to one SWEET girl" or something cheesy like that.


They make wonderful ornaments too, since they are incredibly lightweight. They can hold photos or business cards too...if you own a bakery or know someone who does, they can also be used in window displays.


 These do NOT contain any food ingredients, so they wont attract pests or animals, mold, rot, or deteriorate. They will last virtually forever.


Petite Fake Bakes are great Christmas tree ornaments !
Or hanging from a chandelier?


DIY Directions....


Materials Needed:
  • a small can of expansion foam (ask for it at your hardware store)
  • cupcake papers
  • newspaper
  • rubber gloves (you WILL want these!)
  • muffin tin
  • mini muffin tin and papers (optional)
  • plastic bags
  • acrylic paint
  • fine glitter (optional)
  • a container of LIGHTWEIGHT Spackle
  • an electric mixer
  • a spoon
  • a bowl
  • pastry bag with star tip (big star tip!)
  • paintbrushes

First step.. Put expansion foam into the papers, inside a muffin tin. Fill 1/2 full.


If anyone tries this – don’t squirt in too much foam – the cakes just kept on growing. Also DO NOT TOUCH THEM – there is no stickier stuff on the planet.


Next was the painting (the foam took about 5 hours to dry). I used acrylics.


After drying out properly overnight, I had a go at the frosting..


  I used a lightweight  SPACKLE filler. The filler might be to thick so you might need to mix with a little bit of water.


Next step..EMBELISH!!!


Cut in half, and glue a magnet to the back, and get these adorable magnets for your icebox!


                  For the liners I used a silver doily cut like this.

Faux Cupcakes are a perfect idea for Gifts, Wedding Bomboniere's, (Shops) Tea Room Displays, or for that Delectable looking Kitchen Display!

**********************************************************************************
I will be selling these on Etsy next month .Look for Suzy Homefaker !


Tuesday, September 6, 2011

GLITTER PUMPKINS

Can I just tell ya glitter is my Crack !!


 I loves me anything that glitters, shines, sparkles, lights up.....


You can use fake pumpkins ,or real .I like the fake jobbies cause I can keep them from year to year.I did mine about 3 years ago, and store them in the basement, and they look as great as the day I did them.
Instructions

    • 1
      Spread glue evenly over the pumpkin's surface using the paintbrush. You'll want to do about one-fourth of the pumpkin at a time, spreading glue and adding glitter. Make sure there are no clumps of glue anywhere. You can also use spray glue.Make sure to lay down enough newspaper.
    • 2
      Sprinkle glitter over the pumpkin until the glue is fully covered. The newspaper underneath will catch the extra glitter so you can reuse what has fallen off. Repeat Steps 2 and 3 until the pumpkin is fully glittered.
    • 3
      Once the pumpkin is completely covered with glitter, let it dry for an hour.
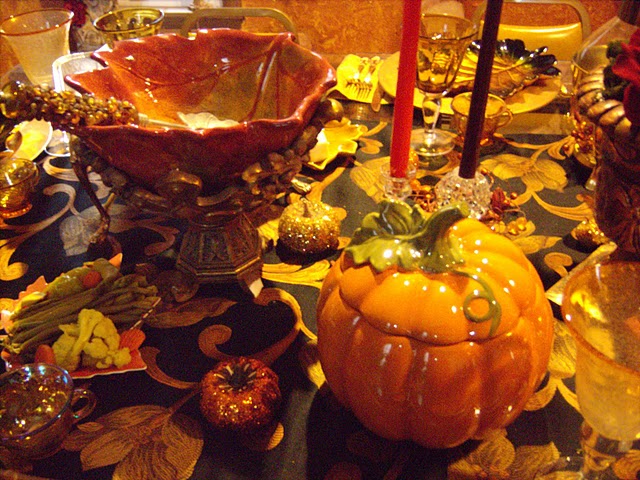
There are about a dozen glitter pumpkins on this tablescape, but with all the food, you cant see them very well. Any way, they are beautiful against candlelight.Trust me!
I have also used them at each place setting with name cards attached, but be careful if you do this....your guests will take them home with them!


BABY HIGH CHAIR RE-DO

I found my son's and mine, old high chair in the basement, that we had moved a few years back from my mom's basement. She lived in a flood plain, so the bottoms of the legs had a bit of rot going on.This made it unlevel. I could have cut 4 inches off the bottom, but then it wouldn't sit right at my dining table.So here's how I resolved it the frugal (cheap)way. Or as I refer to as the "Homefaker" way!
BEFORE


AFTER

First and foremost was cleaning it up...

2nd was a Nice coat of Cabot...no I didn't strip or even sand it first...I always use this stain and have never had a problem yet.If you use anything else, the results may be all different.


The back is actually an old picture frame, glass removed and screwed to the back with wood screws. I decoupaged a piece of fabric in the middle where the picture would go.

TRADITIONAL CORNER GUARDThe bottoms of the legs were water damaged/rotted,so I found a couple wood corner guards, cut them in half, painted them black, and attached them to all four legs with wood screws.I think it adds a touch of charm.


I absolutely love it...


I had to use my Pom for a baby...Do ya think a girl could get a grandbaby up in here !!!


Mason Jar Lemonade Iced Tea


I’m a big fan (huge actually) of fresh, homemade, lemonade and brewed iced tea. But, since there are only two of us, it doesn’t make sense to make a big pitcher.


 Whether you’re enjoying time in the barn, lounging in the garden or just running to town for errands, spring is a great time to enjoy a batch of good old fashioned refreshment.


Here’s what you need:
Quart mason jars (with lids)
Fresh lemons
Water
Ice cubes
honey
 lemon juice
 black tea bags or flavored tea bags
Fresh mint or lemon verbena from the garden
Here’s what to do:
Fill jars halfway with warm water (the warm water helps dissolve  honey). Cut a lemon in half and squeeze the juice into a jar, and plop the cut lemon into the jar as well, making the water tart and filled with little bits of pulp and flavor. If you really want to kick up the tartness – add some fresh lemon juice (about a teaspoon) to the mix. Then add as much sugar or honey as you like (depending on your mood and the weather it could be as little as a teaspoon or as much as 2 tablespoons). Top it off with ice till it’s nearly overflowing. Seal the lid and shake the hell out of it until its one big, frothy, icy delight. There you have it. Farm fresh, all natural, and ready for travel.
For the Iced Tea:
I just pour hot water from a kettle into room-temperature jars with  black tea-bag and let it cool on the kitchen counter. Then I drop in a lemon slice and a bit of sugar, some ice, a sprig of mint and sit it in the fridge alongside the jars of lemonade. 
I make several of these and stash them in the fridge so I’m never out of a refreshing drink. Instead of grabbing a can of soda, I grab a cold jar of real lemonade in a reusable container, which not only tastes amazing, but feels more authentic than any processed beverage.
Need to please a crowd?
Try this “Lemonade for 100” recipe from the “Joy of Cooking”.
Boil for 10 minutes
4 cups water
8 cups sugar
Cool the syrup. Then stir in:
71/2 cups fresh squeezed lemon juice
To serve, simply mix the concentrate with 4 gallons of cold water and serve over ice.
There you have it – enough lemonade concentrate to quench the thirst of any army.
Add style to your outdoor gathering by serving it in pint-sized mason jars with bowls of sliced lemons, mint and lemon verbena as garnishes.
                Thanks for having Tea With Me !!!


Sunday, September 4, 2011

FRESH SALSA HOME CANNED

                      HOMEMADE SALSA


Ingredients


      • 4 sweet onions, chopped
      • 3 green bell pepper, coarsely chopped
      • 2 cups fresh cilantro
      • 5 sliced pickled jalapeno peppers, or to taste
      • 45  diced fresh tomatoes, (about 18 pounds) boiled and skin and core removed
      • 1/4 cup olive oil
      • 4 Tablespoons minced garlic
      • 1 1/2 cups red wine vinegar or white distilled
      • 4 limes, juiced
      • 1 teaspoon  sea salt

Directions

  1. Place onion, bell pepper, cilantro,garlic and jalapeno peppers into a food processor. Pulse until finely chopped. Add tomatoes, and pulse just a few times until the tomatoes are coarsely chopped. Transfer to a large kettle or dutch oven. 
  2. In a separate bowl, whisk together olive oil, red wine vinegar, lime juice, and salt.
  3. Pour dressing over tomatoes, and stir well while heating just until boiling.
  4. Pour hot salsa into clean, sterilized pint canning jars, leaving 1/2 inch head space. Cap each jar when filled.
  5. Process for 30 minutes in boiling water bath.
  6. Test jars for airtight seals..

Makes 18 pints


Saturday, September 3, 2011

NATURAL GARDEN APPROACH


While watching a movie depicting the struggles of early settlers in the 1600s, there was an interesting scene showing a 
group of women planting a garden with the help of Native Americans, who were tossing a fish into each hole before 
transplants were put into the ground.  It brought back memories of how decades ago, I used the water from my 
 large aquarium to fertilize my perennials, spread the ashes from our fireplace to amend the soil, and mulched 
everything with compost made from the leaves of our trees.  The good old days!  Nowadays, I put on my reading glasses
and search the labels of the myriad bottles and bags lining the shelves in the garage to find the right chemical for treating 
whatever  may ail  the garden.  Are my 
gardens vastly improved?  No.  Is it less 
costly?  No.  Is the environment better 
because of it?  No.  
I am making it my mission to go back to grandma's old tricks, that being said I know some of them are quirky,and can't possibly work, but I'm gonna give them a fair shot anyway. Here are a few...


1. Carefully sprinkle diatomaceous earth around plants to prevent slugs from feasting on them.  Reapply after rain. 

2. Mouthwash is a good fungicide.  Dilute it 4:1 with water and spray for black spot and powdery mildew.
  
3. Homemade insecticidal soap works better and faster than commercial insecticidal soap on aphids, spider mites, and 
whiteflies.  Recipe: 1 tablespoon liquid dishwashing detergent + 2 drops cooking oil + 1 gallon water.  Spray tops and 
bottoms of leaves once a week.
    
4. Neem is a good insect repellent that is non-toxic to animals and humans and beneficial to bees.
  
5. Japanese beetles can be knocked off the plants in the early morning (before they are able to fly) into a bucket of 
soapy water which kills them.  Also, a milk jug with the top off and beetle mix in it will trap them.  Recipe: 1 cup water 
+ ¼ cup sugar + 1 mashed banana + 1 package yeast.  
6. Control weeds between bricks or in sidewalk cracks by spraying with a vinegar solution.  Recipe: Combine 1 cup salt 
+ 1 teaspoon liquid detergent + 1 gallon vinegar in a bucket and sprinkle or spray over weeds.  This is also very effective 
on poison ivy.
  
7. Keep garden bed weeds from sprouting by laying down newspaper and covering with a thick layer of mulch. http://suzyhomefaker.blogspot.com/2011/05/recycled-garden-weed-barrier.html 


8. Make sow bug traps with a small plastic container with lid and 2 teaspoons of cornmeal.  Cut a small hold at base of 
container, large enough and close to the bottom to allow sow bugs to climb in.  Add cornmeal to the container, cover 
and place in infested area.  After feeding on cornmeal, the bugs will drink and explode!  Bam!
  
9. Mosquito dunks (Bt briquettes) will prevent mosquitoes from breeding in your water gardens.  Each briquette treats 
100 square feet of water and lasts 30 days. 


10. Grow flowers and herbs beside vegetables.  Flowers attract pollinators, enhancing fruit production and beneficial 
insects to destroy pest insects .Common sense hugh. 

11. Use soaker hoses and/or drip irrigation rather than overhead watering to reduce the risk of powdery mildew on 
herbs and flowers. I have mine attached to recycled whiskey barrels that I made into rain barrels on each corner of my house attached to the downspouts .What's better than FREE untreated water ! 


12. Use coffee grounds to mulch around acid-loving plants such as blueberries, azaleas and dogwoods.  Dig a banana 
peel into the ground beside each rose bush.


By gardening using organic methods, we become good products to the environment.  There is no single right or wrong way to garden.  It is up to each of us to choose the combination of methods that is safe and effective.


                                 Happy Gardening Ya'll!!